Image Map

Thursday, December 12, 2013

Peanut Butter Hot Chocolate

Anyone else live on hot chocolate during the winter months? Hot Chocolate is my go to, get me warm and get me up, drink. I love trying to find ways to change up my normal Swiss Miss Hot Cocoa mix. Well today ladies and gentlemen I have found a way to blow your MIND! Just by adding 1 tsp. of creamy peanut butter it takes your regular cup of hot cocoa to a Reeses Peanut Butter Cup LIQUEFIED!
 HALLELUJAH!
 WHAT A FABULOUS MORNING THIS WILL BE!


Do your normal thing with your hot cocoa mix - a couple tablespoons powder and water or milk.
Then add 1-2 teaspoons creamy peanut butter and stir stir stir. 
Drink up and unwind! 
DELISHHH!


Linking up here

Wednesday, December 11, 2013

Kitchen in a Mitten - Present

I recently gave this "Kitchen in a Mitten" to a cousin of mine's fiance. She was having a bridal shower and I wanted to "shower" her with my most favorite things in my kitchen. I went out and purchased my most favorite things, or the most used things, in my kitchen. This is a great Christmas present, wedding present, birthday present etc. Check it out! I'm sure you will see lots of things you use in your kitchen too!


The Supplies:


Place all supplies in the oven mitten, tie a bow around it for the finishing touch. 
Then give someone a "Kitchen in a Mitten!"


Linking up here

Tuesday, December 10, 2013

Got Bunchy Sleeves?

Are you like me and hate bunchy sleeves under you sweaters and cardigans? Maybe it's just me because it seems like all of my shirts are always the wrong length for my cardigan. I have A LOT of 3/4 length cardigans, and all of my shirts I wear with them are either short sleeved, so you see the cuff in the middle of the cardigan. Or my shirt is long sleeved and a 3/4 length cardigan just don't work. WHAT AM I TO DO?! 
Well here is the solution I came up with! 
I have multiple white collared shirts, so I decided to take one and make it WORK with all of my 3/4 length cardigans! Check it out! No more football arms over here!


I took my "mid arm" collared shirt that always "bunches" inside my cardigans. 

I cut the sleeves - total red neck underneath, all business outside! ha ha

Put on the shirt and PRESTO! NO MORE BUNCHY SLEEVES! YAY! 
This is one of my most favorite shirts now! 


Linking up here

Sunday, December 8, 2013

Almond Crusted French Toast

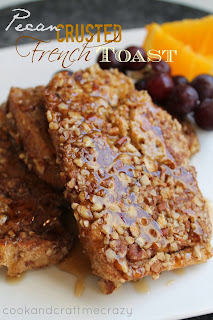
Family coming soon? Well I just made this for our family that visited during Thanksgiving and it was a huge hit! I previously made Pecan Crusted French Toast and that was fabulous as well. I wanted to try a different texture not only with the nuts but also with the bread. Both are different but yet fabulous! This was AWESOME!


Almond Crusted French Toast

3 eggs
1/4 c. Milk
1 1/2 c. Sliced Almonds
1 tsp. Cinnamon
1 baguette - cut into 1/2 in. thick slices

Preheat oven to 200 and line a baking sheet with parchment paper.

Grab 2 shallow bowls, in one shallow bowl  place your eggs and milk and whisk until combined. In the other shallow bowl place the sliced almonds and the cinnamon, stir until almonds are coated with the cinnamon. 
Cut your baguette and get started!

Grab your pan or griddle and turn the heat to medium/medium high. Lightly grease your pan.  Dip one slice of bread, into the egg and milk mixture then into the cinnamon almonds. 
Make sure both sides are coated, then lay on your hot pan. Repeat with the rest of the bread. Flip your french toast with a spatula to cook the other side. Press the baguettes down with the spatula to make sure you don't hear eggs sizzling. 

When your french toast is done cooking, remove from the pan and place in the oven on the parchment paper lined baking sheet to keep warm. 
When your done cooking all of the french toast you will be able to take the whole pan out of the oven and sit down and eat all together! GENIUS! Serve with your favorite syrup. DELISH!

*Keeping the french toast in the oven didn't dry it out. It was just as wonderful as it could be!


http://cookandcraftmecrazy.blogspot.com/2013/03/pecan-crusted-french-toast.html


Linking up here

Saturday, December 7, 2013

Clothespin Reindeer

What little kid doesn't love to make ornaments? I know my mom made me keep all of my handmade ornaments all the way back from preschool. I still have a few, and they remind me of things like this! I love making anything reindeer. From ornaments, to pictures and reindeer food for Christmas! They are one of my most favorite things! They're so magical and fun. Maybe it's because I've always wanted to fly. If you were to ask me, "If you could have any super power, what would it be?" I would instantly say flying! Sorry, off the subject.

My little girl June who is almost 3, and I had a little play date with one of her friends. We made these ornaments together. All of the materials except the paint were given to us for free from CraftProjectIdeas.com. We love how kid friendly their products are. This was such a fun activity to do with kids! They both LOVED it! And when they were done, they kept asking, "Where's my Rudolf? Oh! He's sitting in the tree!"
Check it out! This would be a great school project! 


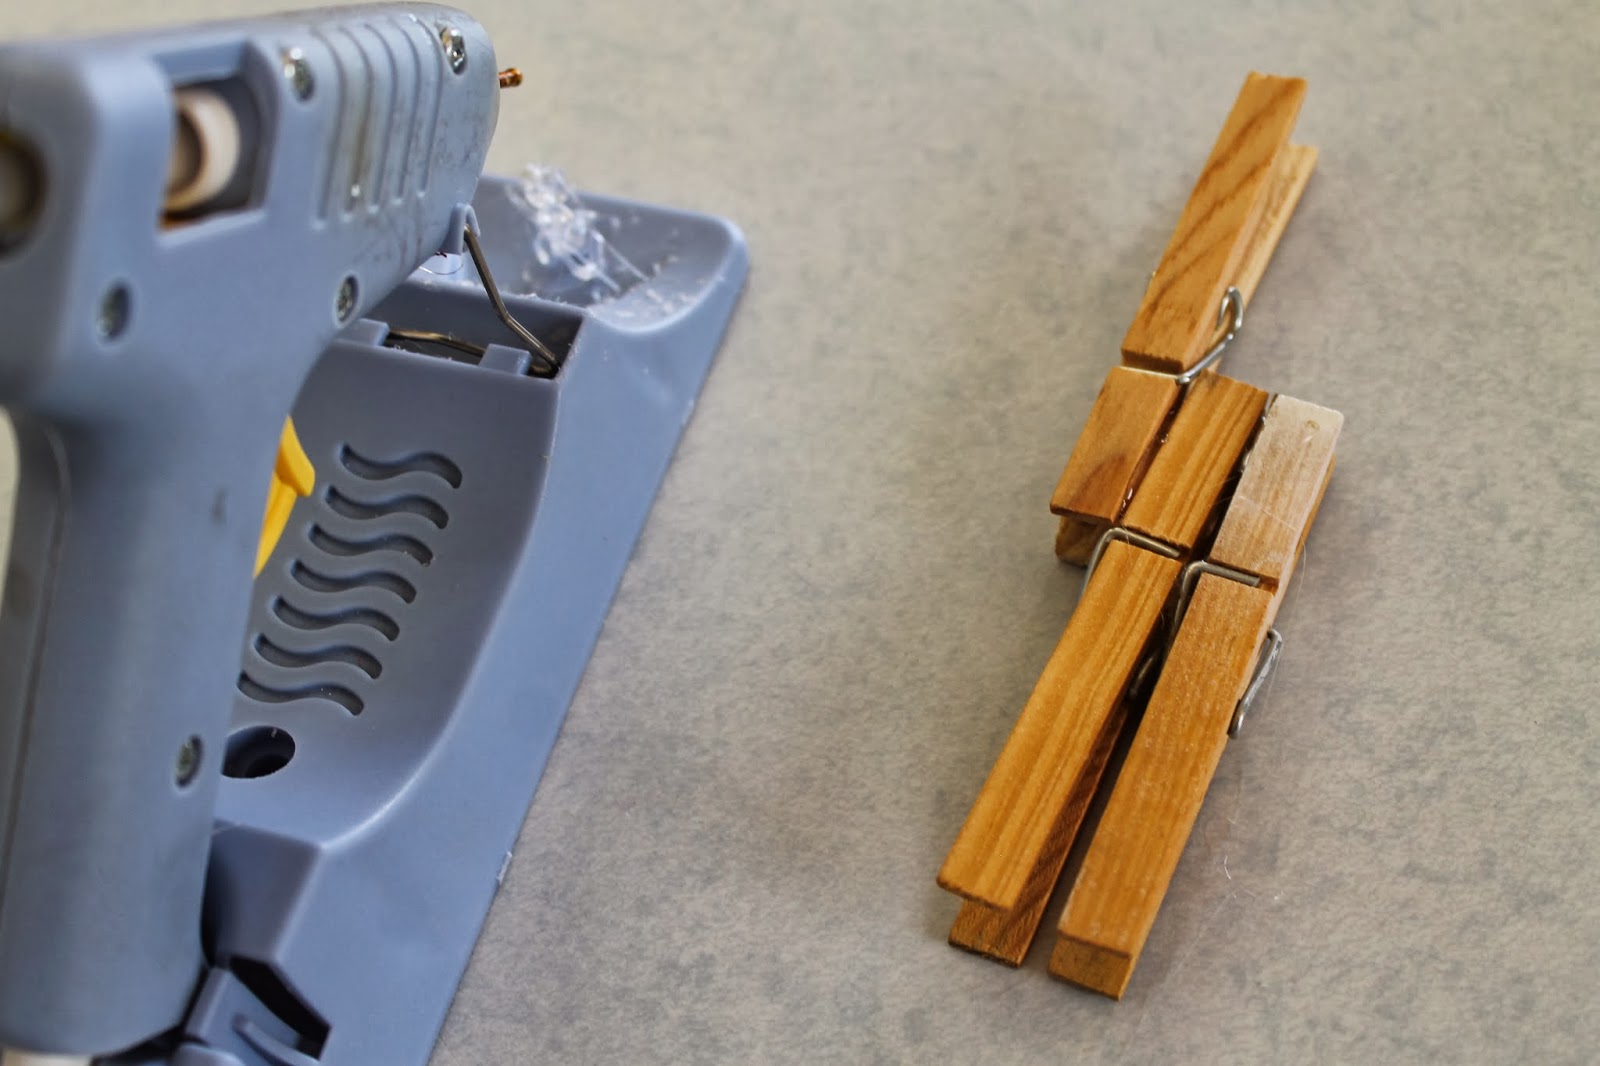
Simply hot glue 2 clothespins side by side like so...


Then hot glue another clothespin with the "pinchers" as we call them touching the other "pinchers." Like this...


Paint the Bodies Brown... Aren't they so cute?!


Then glue some googlie eyes and a Sequin nose on the front! So cute and so simple!


Linking up here

Friday, December 6, 2013

Pumpkin Crumb Cake

Who still has pumpkin desserts for Christmas? WE DO! We say NO to just having pumpkin treats on Thanksgiving. We have them for at least for 2 months if not more. So here is our newest favorite. Easier than Pumpkin Pie and in MY OPINION - tastes better. NOW THAT IS SAYING SOMETHING because I am a HUGE connoisseur of Pumpkin Pie! So when my husband's Aunt Laura brought this to a family party a couple months back I DIED and went to heaven. Then I was reborn with this pumpkin dessert in hand. I begged for the recipe and even had it as my birthday dessert. Am I a little dramatic? Yes I am, but seriously this is worth the try! You can thank me, and Aunt Laura later.


Pumpkin Crumb Cake

1 white cake mix
3/4 c. butter
1-16 oz. can Libby's Pumpkin
2 eggs
1 can sweetened condensed milk
2 tsp. cinnamon
1/2 tsp. nutmeg
1/4 tsp. ground cloves
1/2 tsp. ginger
dash of salt

Preheat oven to 350 degrees. Ignore cake mix directions and place the "powder" into a bowl. mix in 1/2 c. of the butter (room temperature). Mix to look like crumbs.

Place half of the powder mixture in a greased 9x13 glass pan to a flat layer. Reserve remaining crumbs for the top.

Combine pumpkin, eggs, sweetened condensed milk, cinnamon, nutmeg, cloves, ginger and salt all together.Mix until well combined. Pour pumpkin  mixture over top of the cake "crumb" layer in the pan. Add the reserved crumb mixture to cover the top. Sprinkle evenly. Melt the remaining 4 T. butter and drizzle over the crumb mixture to finish the top. 

Bake for 35-45 minutes or until top is golden brown and center isn't "giggly." Insert a toothpick or knife to the middle of the "cake" and make sure it comes out clean. 
Let it set for 5-10 minutes then serve with whipping cream. 
YUMMMM.....


Linking up here


Thursday, December 5, 2013

Glitter Scrapbook Paper Cone Trees

Here is yet another set of my Scrapbook Paper Cone Trees! Aren't they GORGEOUS?! They look like I spent $10 a piece on them, and guess what I made them for? .50 cents to $1 a piece! That's right! CHA-CHING! AMAZING! They are classy and so "silver and gold." I love my mantel/shelf! Check it out! It only took me $5 and 20 minutes to make them all! 


These are the instructions from my previous Scrapbook Paper Cone Trees but I did the EXACT same thing with these glitter cone trees.


Roll the scrapbook paper into your desired cone shape.


Staple the paper together at the back


Cut off the excess paper on the top


Cut the bottom evenly and straight so the cone stands upright and tall.


Hot glue the flap down. and you're done!

This is if you want a "scrap piece cone"
I spent all of this money on these pretty pieces of paper to just get 2 cones from each. One large and one small or 2 medium. I wanted more cones. So I took the small scraps of paper from trimming the tops and bottoms of the bigger cones and made these! See how I didn't need to make the cones perfect? Just the top one had to be perfect, the bottom 2 or 3 just needed to have straight bases.


I stapled all of the pieces together into the round shape


Then I stapled all of the pieces together


I finished with hot glue. SO FUN AND PRETTY!


Linking up here