

This has been tested by my child, and I approve. My little June (2 1/2) and I made these together and had a blast. Halloween is right around the corner and we wanted to add fun homemade decor to the house without breaking the bank. We grabbed some glitter shakers we received for free from craftprojectideas.com to use how ever we wanted, card stock, mod podge and went wild. I asked her what she wanted to have the pictures to be, and the first thing she said was a kitty cat. (She was a black cat for Halloween last year) So we made a cat, a pumpkin, and a moon. I love the colors, they remind me of this fall and Halloween Season. Super simple and fun for all ages.


Shake, shake, shake.
I loved these glitter shakers because June could go wild, and it wasn't a container that just DUMPS everywhere! It was AWESOME to have some sort of "control."


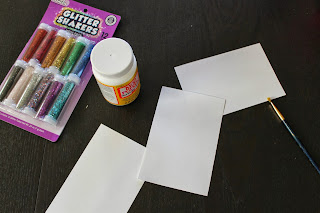
My metal frames I had on hand were 4x6's so I cut three 4x6 pieces of card stock.

I drew 3 pictures in pencil, because I mess up A LOT, and as you can see I erased a few times until I got it right. You can always just print off pictures to trace if needed too.

Take the pictures and place on a larger sheet of paper to catch all of the excess glitter.
Paint with the mod podge on the design and have your child shake those glitter shakers like it's no ones business.
Paint quickly because the glue dries fast.

Shake, shake, shake.
I loved these glitter shakers because June could go wild, and it wasn't a container that just DUMPS everywhere! It was AWESOME to have some sort of "control."

I have to admit I am one of the biggest glitter haters in the world because it ALWAYS SHEDS! I love the way it looks but I hate that it never stops shedding until it's all gone. Well my dear art teacher in high school taught me a trick about glitter I would like to share with you.
HAIR SPRAY
Hair spray holds the glitter in place. There is also clear "spray paint" I forget what it's called but that would work too.
Just spray those pictures with hairspray or clear coat and let dry. When done, frame and adore!

Linking up here
No comments:
Post a Comment