

This is one of the many things I did while on vacation. My oldest sister Candace and I re-decorated her daughter Mackenzie's room. Mackenzie wanted a Chevron wall. Say WHATTT???! Neither one of us has painted a Chevron wall! What were we to do?! Well...I had looked up on Pinterest how to make one, but I was coming up short of how to REALLY make it. So my sister and I drew it all out, did the math, and WE DID IT! We were SOOO excited how it all turned out! This was worth the time and effort! Here are step by step instructions on how we made OUR Chevron wall for Mackenzie.

This room was previously Candace's daughter Morgan's room. She has since moved off to college and now Mackenzie is taking over.
We started painting over the purple into light grey.

While the light grey paint was drying we started to draw things out of how we were going to do this intimidating Chevron wall! We first measured out the wall and figured out how we were going to do our "GRID SYSTEM" (Perfect squares all along the wall)

As you can see the first drawing wasn't enough "zig zags", the second one was still not enough, and the 3rd figuration was just right. The 3rd was 12 in x 12 in squares.

We came up with using Chalk for the GRID SYSTEM. We tested out the chalk on a wall to see if it wiped off, and it did! Instead of using a yard stick we used a longer straight board Candace had on hand. We measured out 12 inches, 24 in, etc. on the board and made dark marks. We then went and measured out our GRID SYSTEM with the white chalk all over the wall.

IT WORKED SOOO WELL WITH TWO! We kept saying, thank heavens you're here to help hold the board, or draw the chalk! It was so nice having HELP!

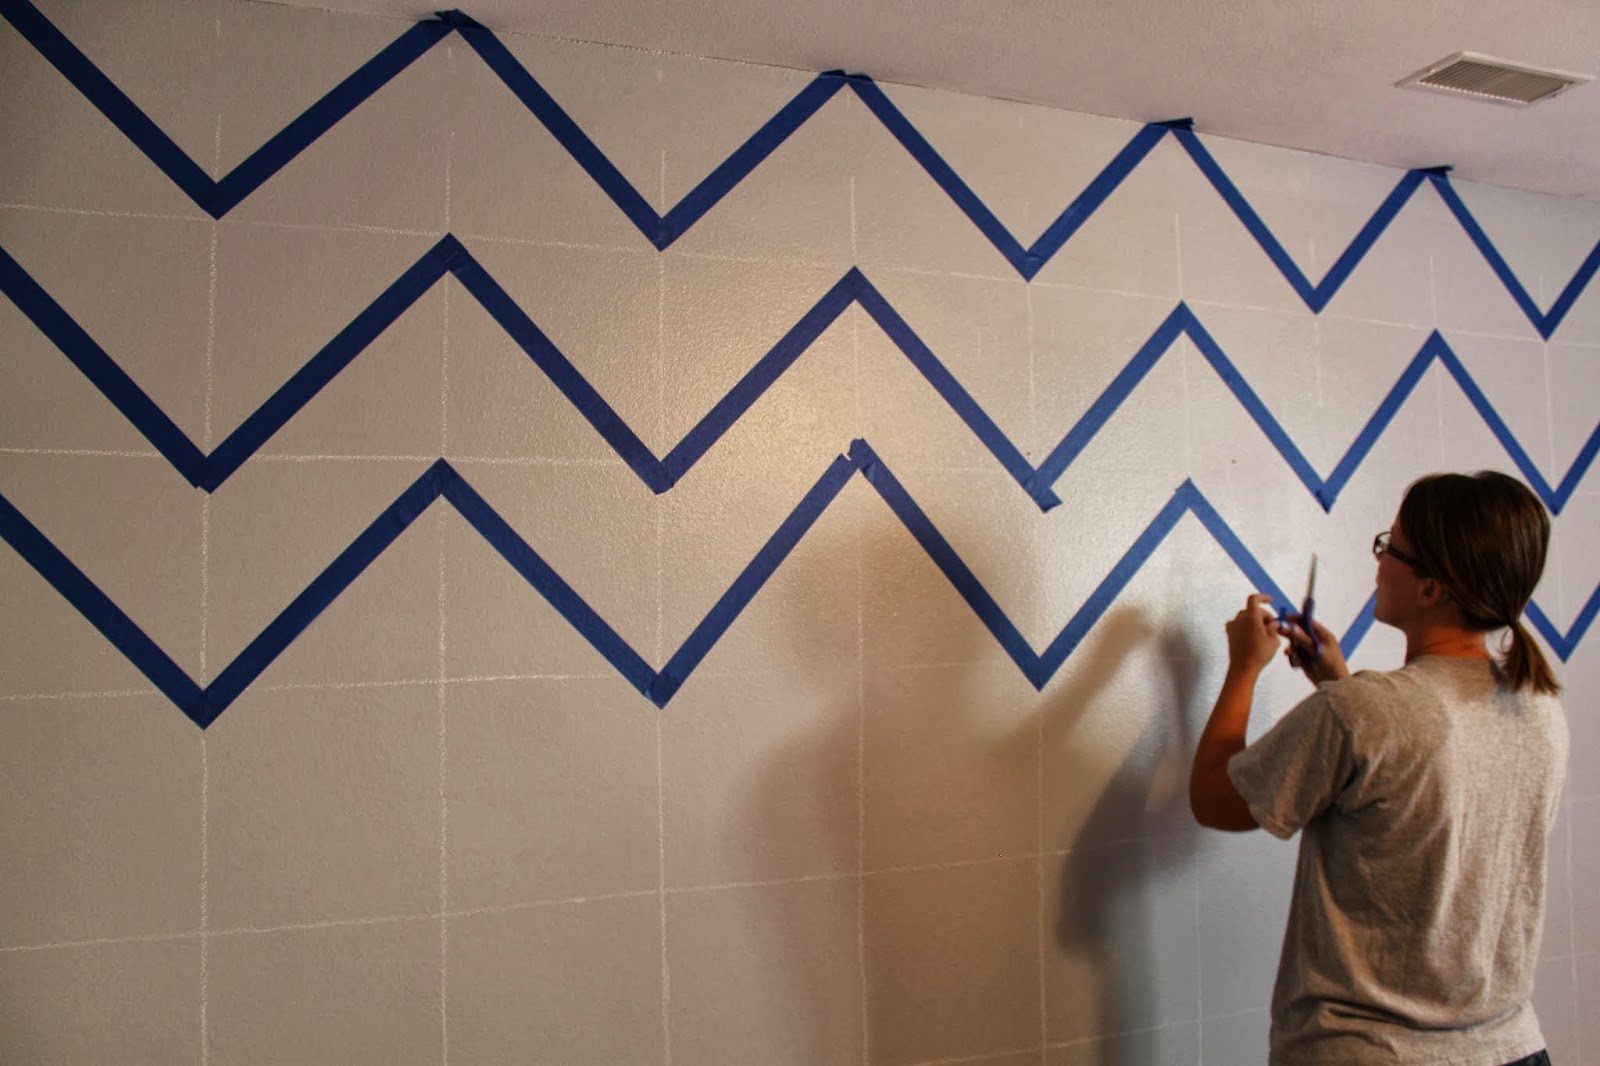
Next came the painters tape. It is simple really, one diagonal piece of tape per "GRID" square. All easy from there right?!
WRONG!
IT IS TRICKY! You have to make sure all of your points match up because you account for your tape width, and what side of the tape you use in your square.
We made a couple mistakes but were able to go back and fix them. Make sure all of your points of the chevron match the exact same on each square.

That's me
That's Candace
(Aren't we cute in our paint grubbies?!)

In the picture ABOVE is one example of a mistake we made but fixed it once we saw it. See how the top "tip" of the chevron is on a different point of the square than the two on the bottom? That's the tricky part I was talking about.

Here's Candace, we had to CONSTANTLY keep making sure all points are measuring the same. It's a tricky thing but AWESOME when done!

After we measured and measured and checked and re checked until we had a perfect chevron wall.

Here I am painting, as fast as I could to get it done before Mackenzie got home got home from Volleyball practice! Talk about a surprise! YAY! We painted the whole room in 1 day, including the Chevron wall!

One of the days before painting, I made my nieces some pillows. I made this "mustard yellow" Bloom Pillow for Mackenzie's bed. SO CUTE! See how to here.

Mackenzie had these mirrored words that were in her previous room, but I personally think they were meant for THIS room! They are PERFECT!

And there you have it folks, this AWESOME Chevron wall and darling yellow accents!
YOUR MOM AND AUNT LOVE YOU MACKENZIE!
Here's a special thanks to our mom who watched my two little ones
while I could do this project with Candace.
THANKS MOM!
Linking up here
Thanks for linking to Take-A-Look Tuesday over at Sugar Bee Crafts - you were featured this week!
ReplyDeleteMandy, SugarBeeCrafts.com